Setting up SSO with Microsoft Entra
Sign in to freispace using Microsoft Entra.
Create Application
-
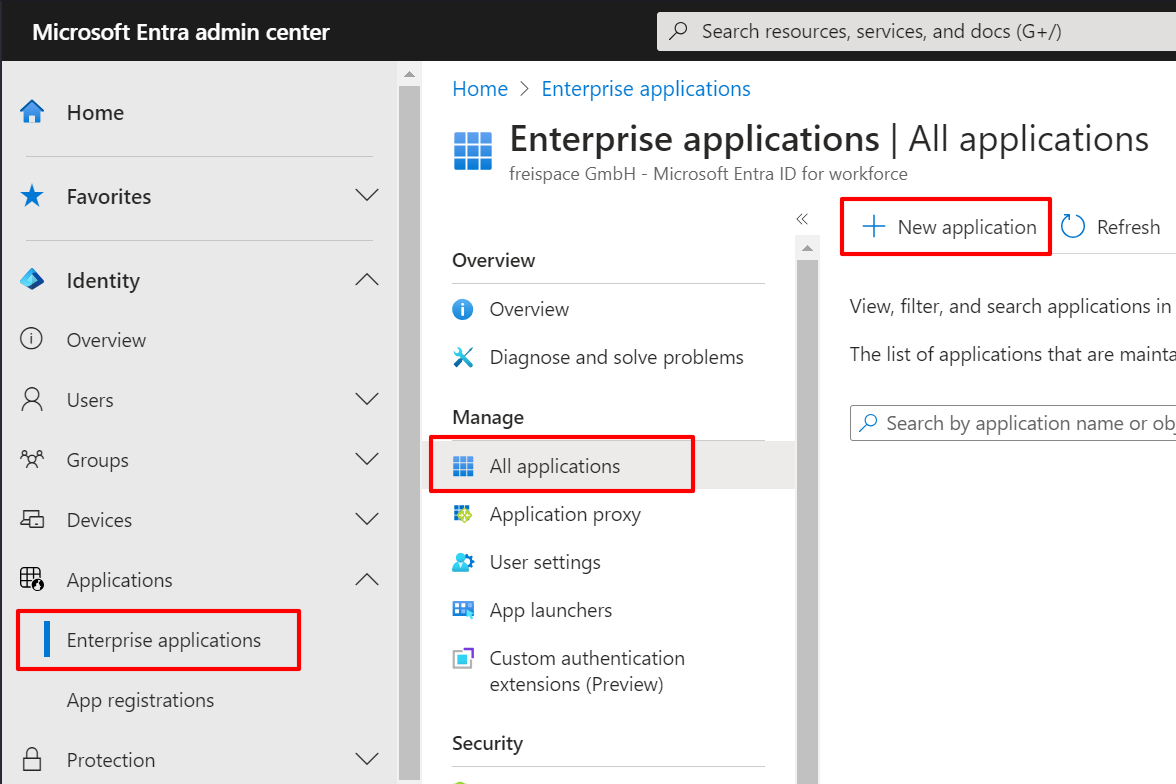
Open the Microsoft Entra admin center at entra.microsoft.com
-
In the left menu, navigate to Applications > Enterprise applications. (You might need to click Show more)
-
Click New application
-
Click Create your own application.
-
Enter the following data.
Field Content What's the name of your app? freispaceWhat are you looking to do with your application? Integrate any other application you don't find in the gallery (Non-gallery) -
Click Create.
A new application has now been created and its settings opened.
-
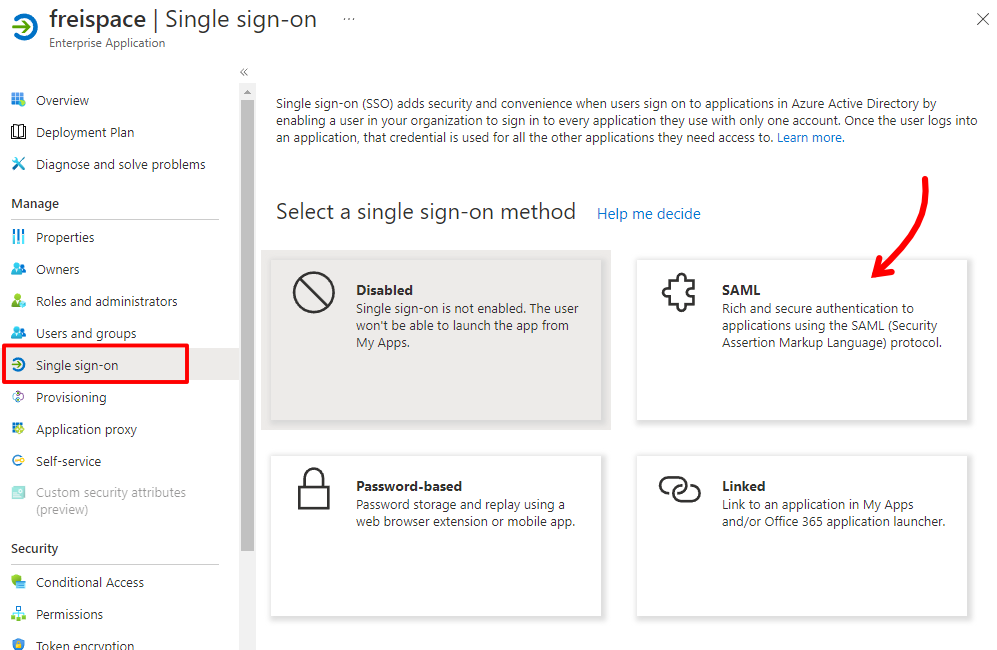
On the left sidebar, navigate to Single sign-on.
-
Select SAML as the single sign-on method.
-
Head over to freispace, and start by clicking Add tenant and entering a name for this connection, i.e. Microsoft.
freispace will generate and display an Reply URL (ACS) and Identifier (Entity ID) right away.
Configuring Microsoft Entra
-
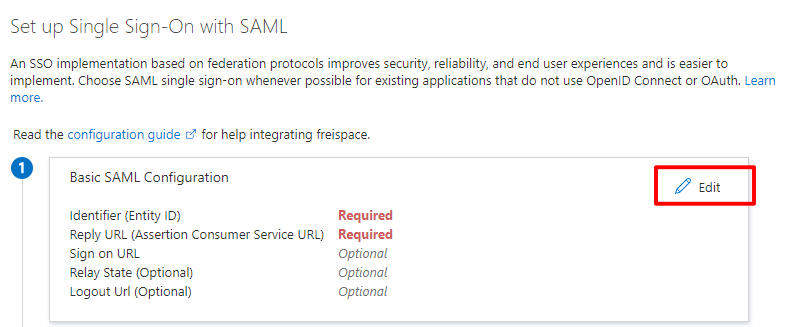
On Microsoft Entra, click the small Edit button on the top right.
-
Copy over the settings from freispace into Microsoft Entra.
freispace Microsoft Entra Example data Identifier (Entity ID) Identifier (Entity ID) https://api.app.freispace.com/api/v1/saml2/xxx/metadataReply URL Reply URL (Assertion Consumer Service URL) https://api.app.freispace.com/api/v1/saml2/xxx/acsTeam Login URL Sign on URL https://app.freispace.com/login/xxx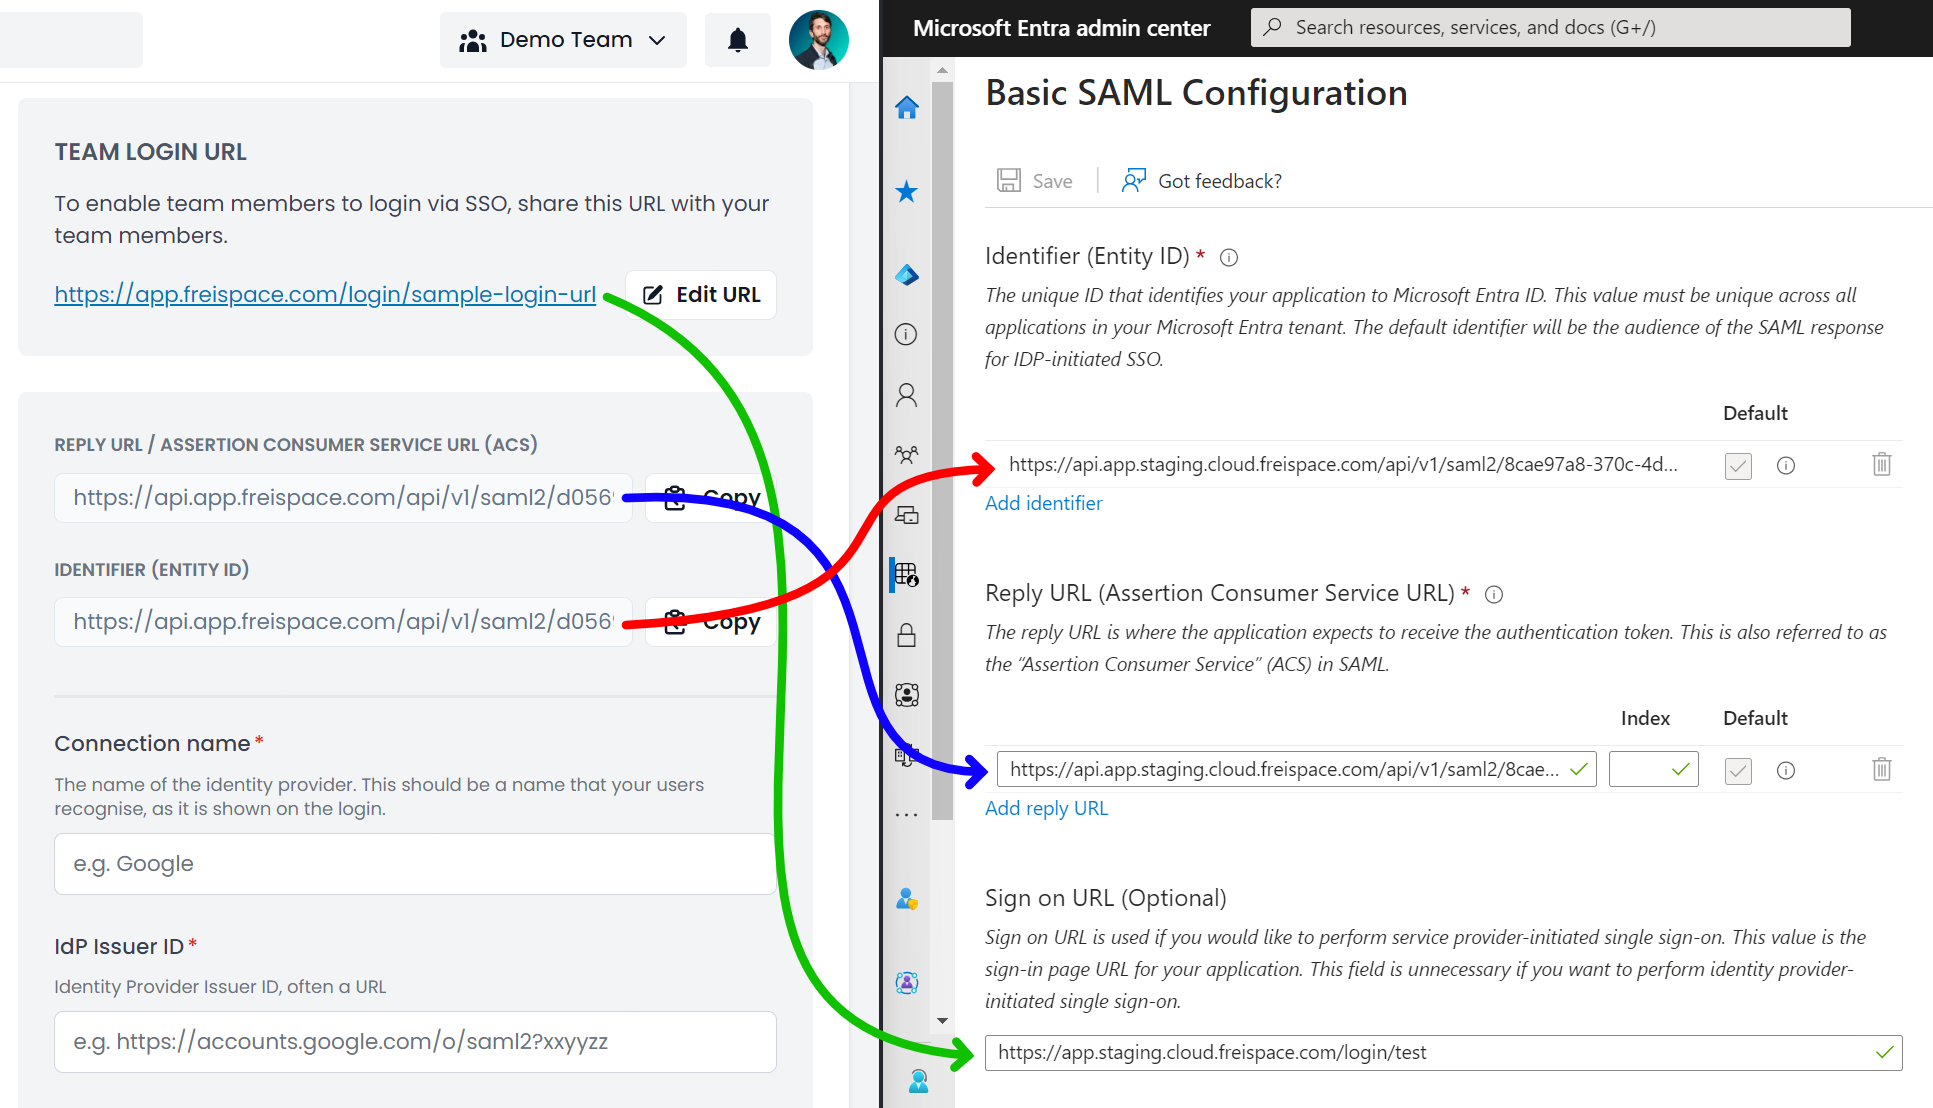
-
Click the small Save button on the top left and the close the menu.
Configuring freispace
-
On Microsoft Entra, scroll down to SAML Certificates and click Download to get the Certificate (Base64).
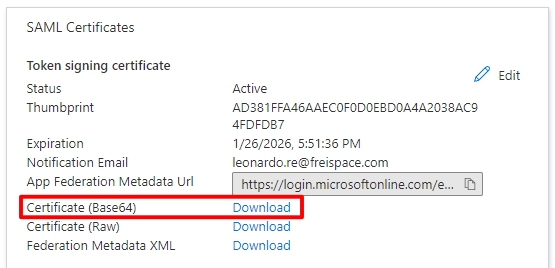
-
Open the downloaded
freispace.cerfile in a text editor. (On windows, right-click the file, select Open with..., select Notepad and confirm with Just once.) -
Select the file's entire content and copy it.
-
On freispace, paste the certificate's file content into the field IdP X.509 Certificate.
-
On Microsoft Entra, scroll down further and copy the settings from Set up freispace into freispace.
freispace Microsoft Entra Example data IdP Issuer ID Microsoft Entra Identifier https://sts.windows.net/xxx/Login URL (SSO endpoint) Login URL https://login.microsoftonline.com/xxx/saml2Logout URL (SLO endpoint) Logout URL https://login.microsoftonline.com/xxx/saml2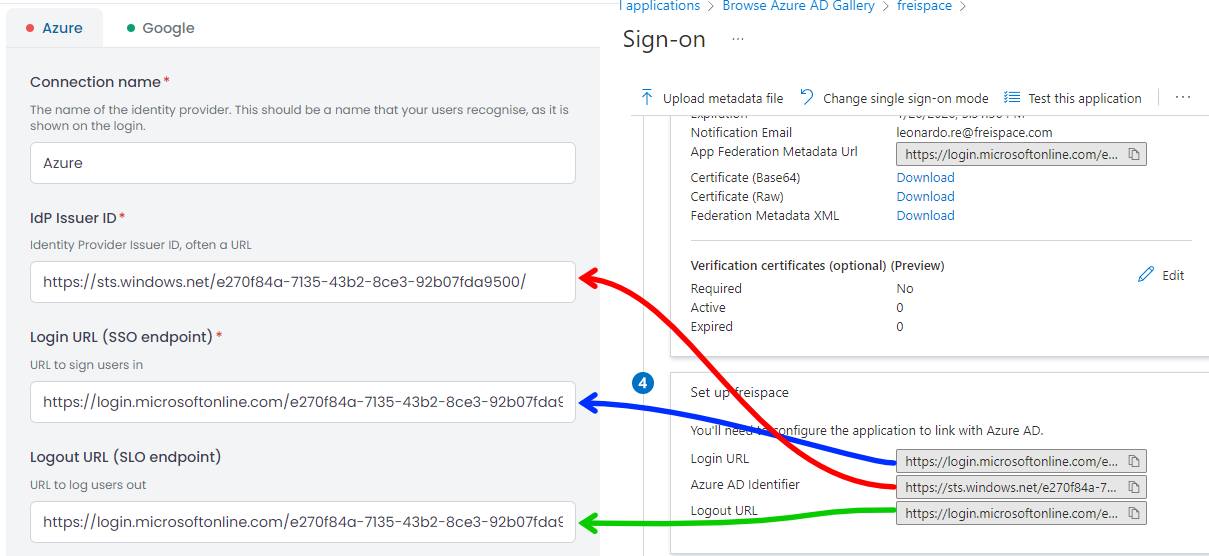
-
Additionally, enter the following data.
freispace field name Data Namespace definition for given names http://schemas.xmlsoap.org/ws/2005/05/identity/claims/givennameNamespace definition for surnames http://schemas.xmlsoap.org/ws/2005/05/identity/claims/surname -
On freispace, click Save settings.
-
Now, click Activate.
Final steps
-
On Microsoft Entra, navigate to Properties.
-
For the Logo, download and then upload this file: freispace-icon.png
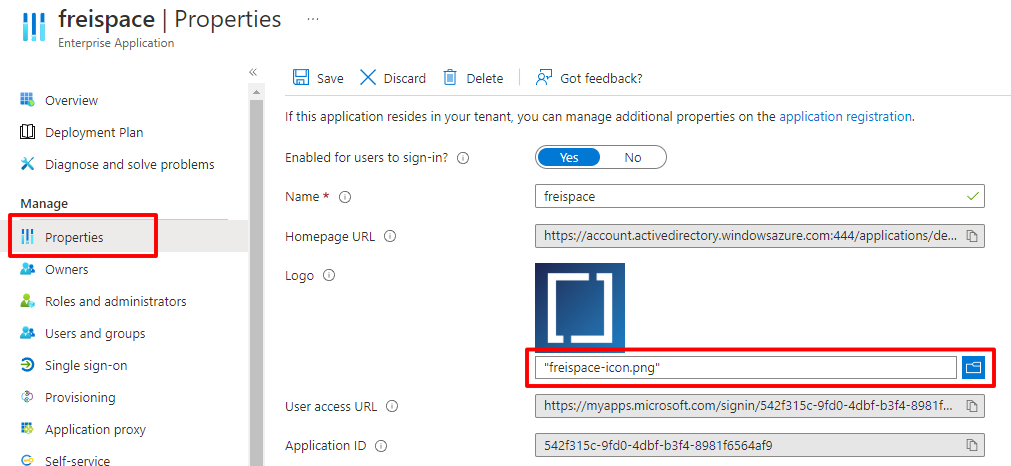
-
Click the Save button up top.
-
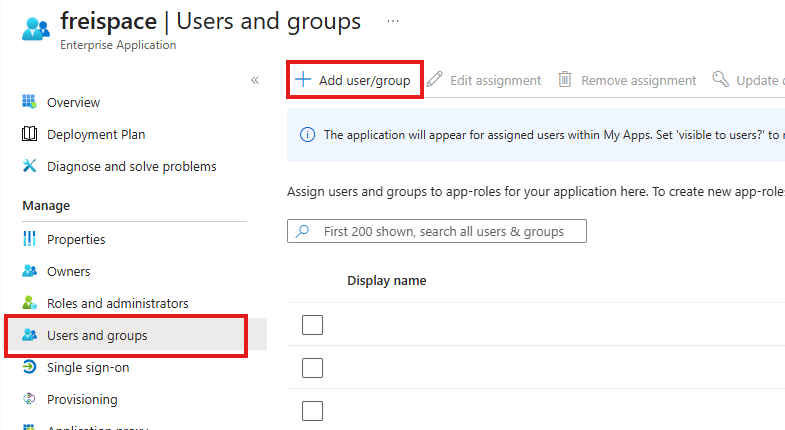
Nearly there! Navigate to Users and groups.
-
Finally, add any users or user groups that should have access to freispace.
Done! 🎉
Users may now login to freispace via Microsoft Entra.