Setting up SSO with authentik
Sign in to freispace using authentik.
Get started in freispace
- In freispace, start by clicking Add tenant and entering a name for this connection, e.g. Authentik.
Create application in authentik
-
Head to Applications > Application.
-
Click Create with Provider.
-
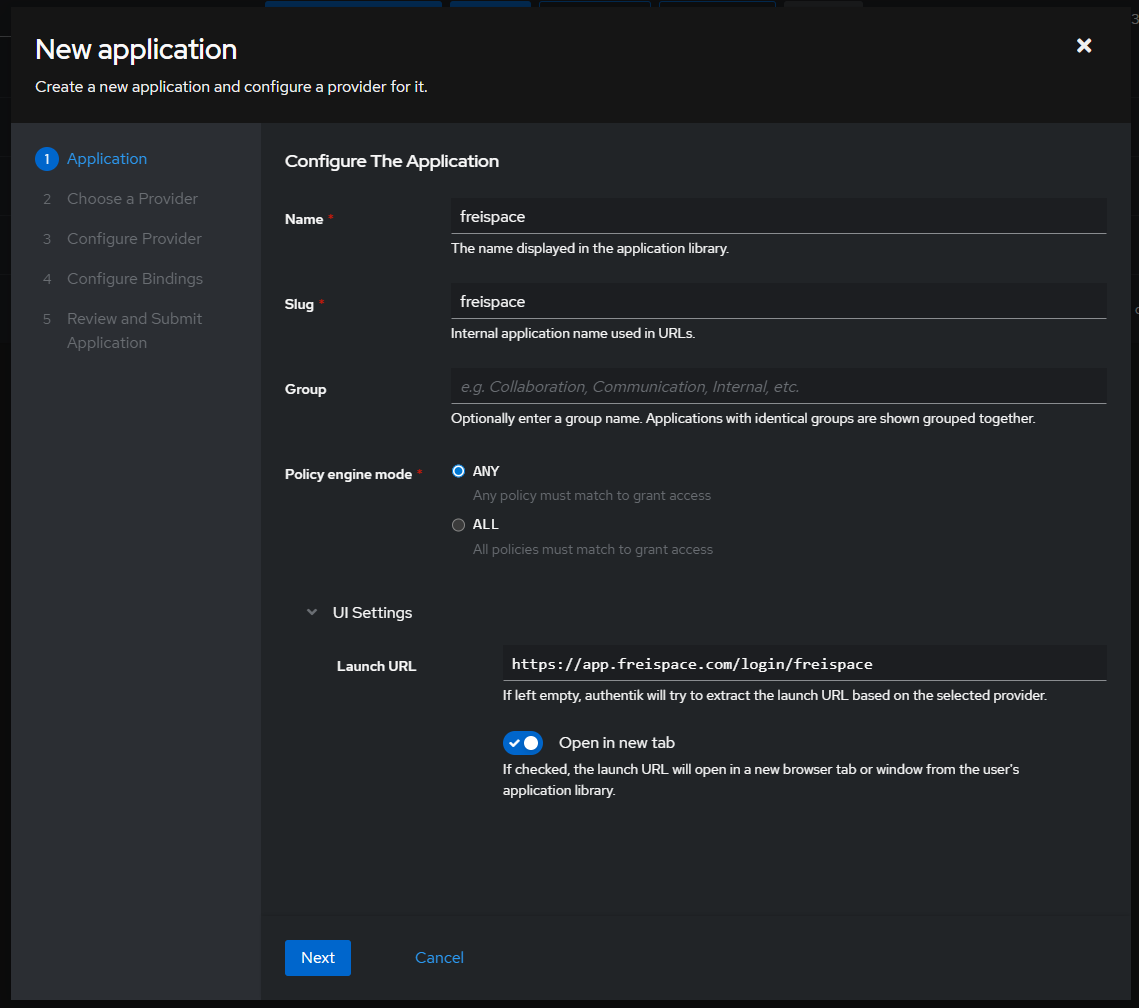
Enter
freispaceas Name. The Slug is set tofreispaceautomatically. -
Open UI Settings and set the Launch URL to the Team login URL from freispace (e.g. https://app.freispace.com/login/your-company).
-
Click Next and select SAML.
-
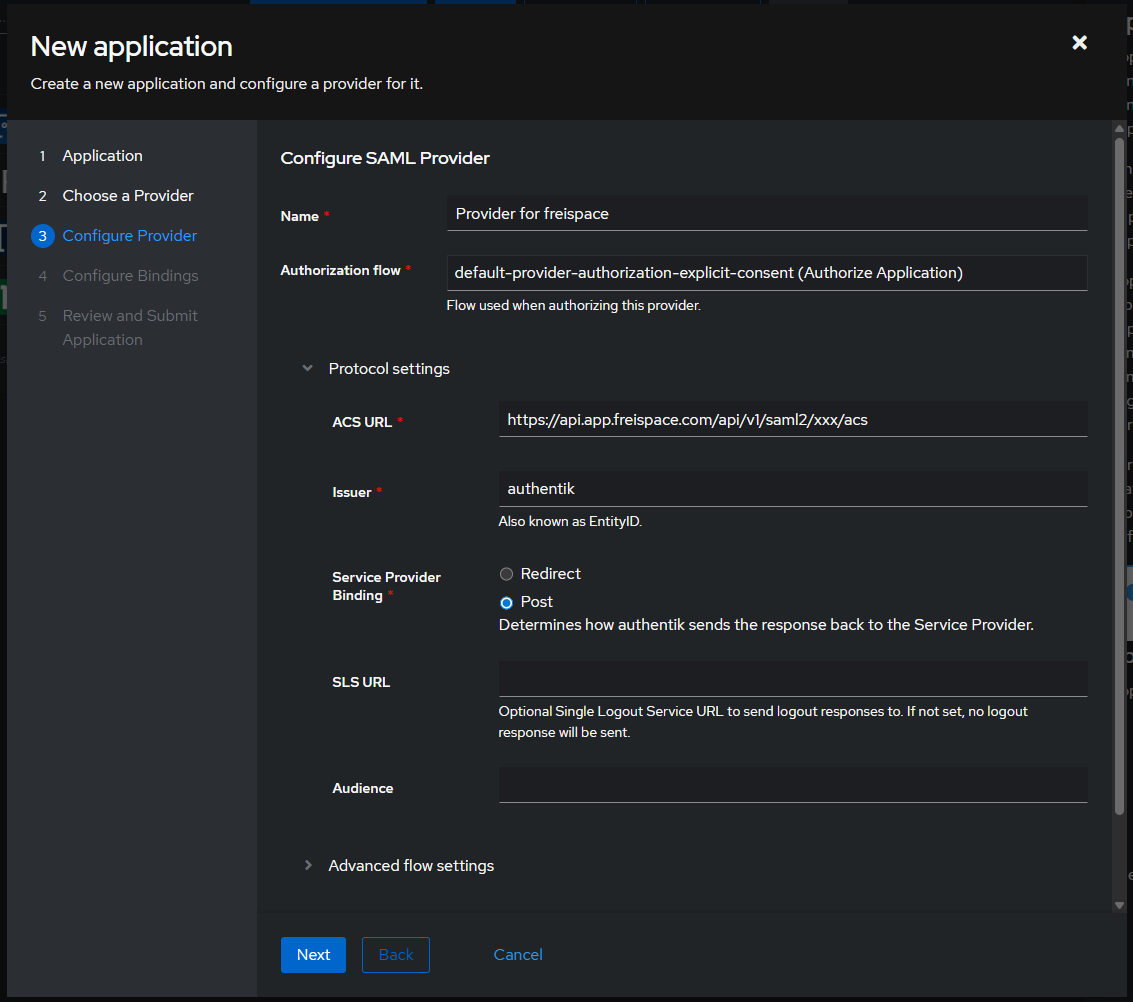
Click Next and select an Authorization flow, e.g. default-provider-authorization-explicit-consent
-
Under Protocol settings, ensure to set:
- ACS URL by copying the value from freispace of the field Reply URL / Assertion Consumer Service URL (ACS) (in the format of https://api.app.freispace.com/api/v1/saml2/xxx/acs).
- Issuer may remain authentik.
- Service Provider Binding must be set to Post.
-
Open Advanced protocol settings and select a Signing certificate (e.g. authentik Self-signed Certificate)

-
Set any additional settings you may want, click Next to step through configuration and finally confirm with Submit at the end.
-
Navigate to Applications > Providers and select the appropriate one, likely Provider for freispace.
Setting up freispace
-
Copy the provided data from Authentik into freispace.
Authentik name freispace name Example data Issuer IdP Issuer ID authentikSSO URL (Redirect) Login URL (SSO endpoint) https://your.authentik.domain/application/saml/freispace/sso/binding/redirect/SLO URL (Redirect) Logout URL (SLO endpoint) https://your.authentik.domain/application/saml/freispace/slo/binding/redirect/ -
In Authentik, click Download unter Download signing certificate.
-
Open the downloaded file in any text editor, copy the entire contents (including
-----BEGIN CERTIFICATE-----and-----END CERTIFICATE-----) and paste it into IdP X.509 Certificate in freispace.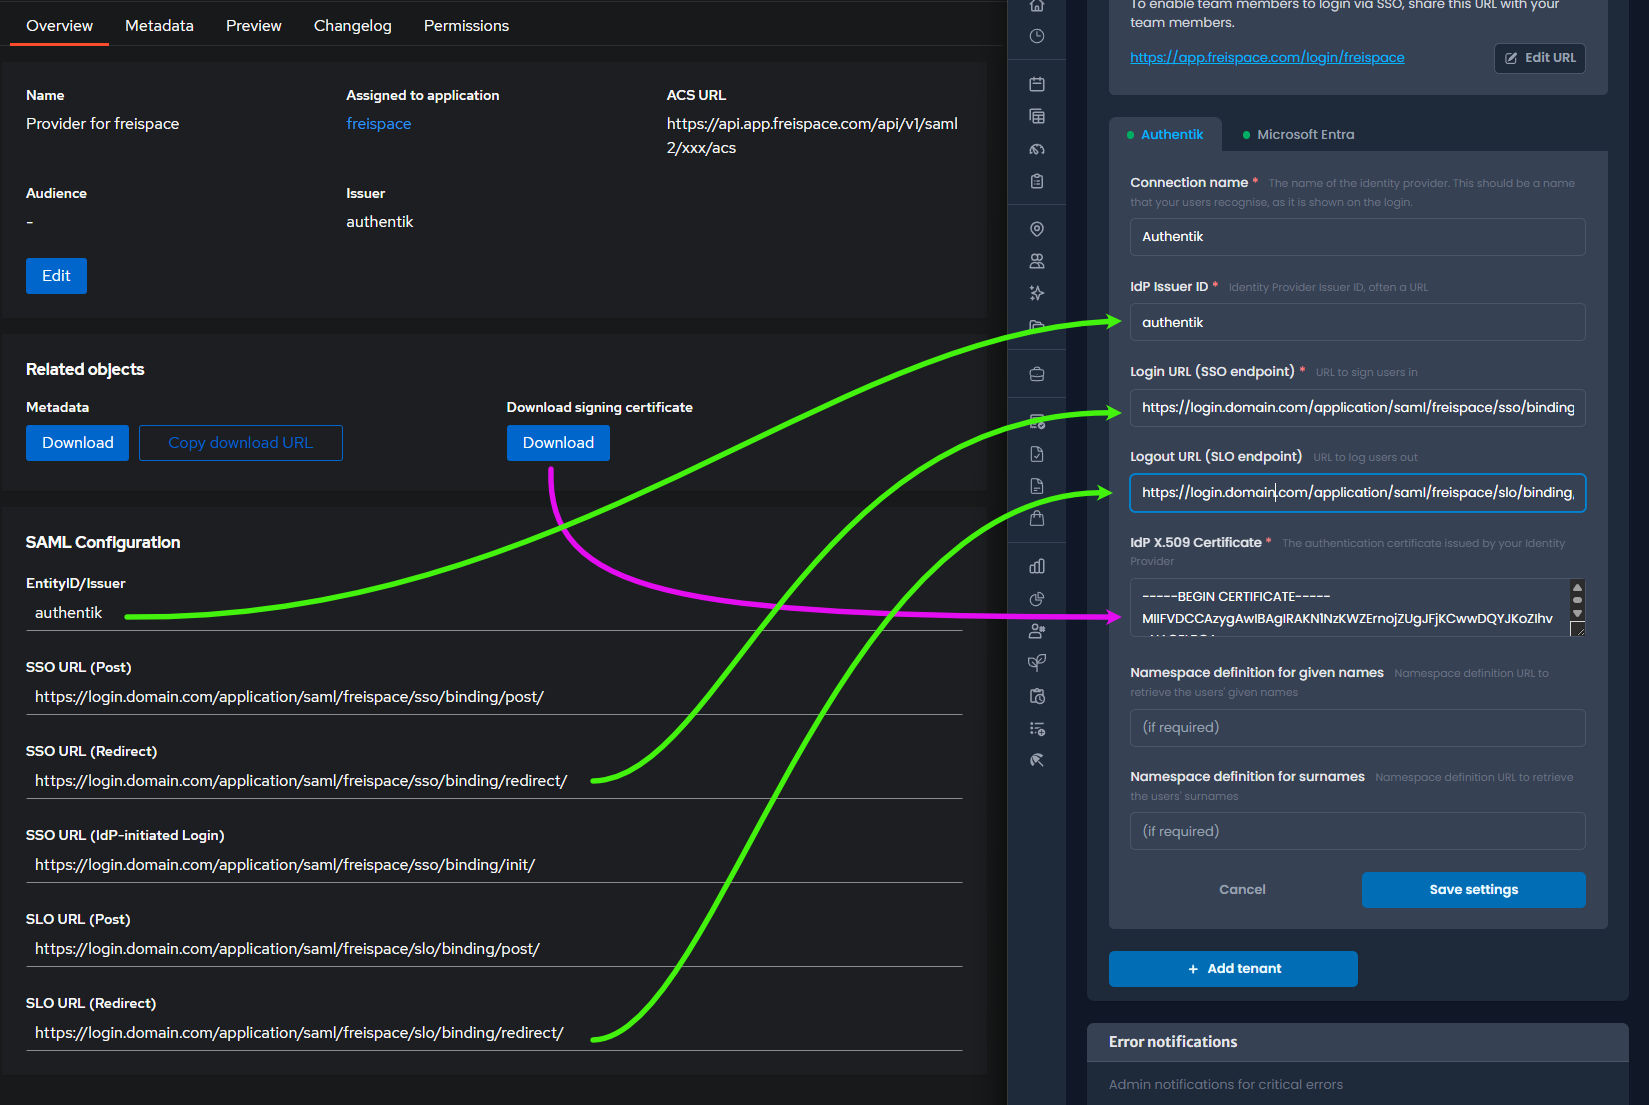
-
In freispace, click Save settings. Ensure to Activate the new tenant.
Done! 🎉
freispace should now appear as an app for your users.